Solve the nearest obstacle first
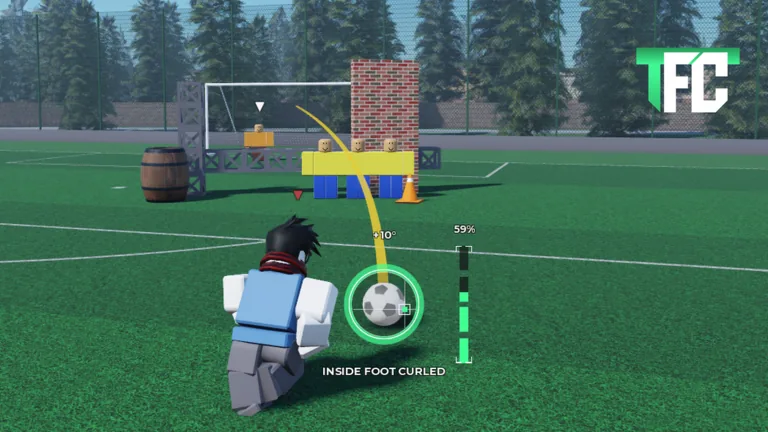
One official That Freekick Challenge image shows a goal area with a defensive wall, brick structure, barrel, and cone. Treat that scene as a planning exercise: start at the ball, follow the visible trajectory, and identify the first object that could interrupt the shot. A route that never gets past the nearby object cannot test your plan for the wall or goalkeeper.
TFC’s Roblox description calls it a customizable freekick sandbox. The image shows obstacle-rich setups, but it does not document every object-placement control or a special obstacle scoring system. Use the options visible in your current session; the practice routine below works whenever you can repeat a shot against a similar layout.
Build difficulty in layers
Begin with a simple wall-and-goal shot. Pick a path that clears the wall and reaches the goal. Repeat it until you can describe a miss without guessing. Then add or choose a setup with one additional obstacle. Inspect how that object changes the usable corridor. Once you can plan around it, try the more crowded arrangement shown in the game artwork.
| Practice layer | Question to answer |
|---|---|
| Wall and goal | Where can the ball pass the defenders and stay on target? |
| One added object | Does it block the route before or after the wall? |
| Several objects | Which is the first collision risk from the ball? |
| Timed attempt | Can you identify that risk quickly enough to commit? |
Do not change every part of the setup at once. If a barrel, wall, and power setting all change between shots, the new result is hard to interpret. Keep the same starting position and alter one condition so you learn what caused the difference.
Use the trajectory as a sequence
Read the yellow guide in three segments: from the ball to the nearest object, from there past the defensive wall, and finally into the goal. The route must survive each segment. If it looks clear near the ball but crosses the wall, solve the wall. If it clears the wall and curves outside the posts, bring the target back. If it enters the frame but the goalkeeper saves it, reconsider the last segment.
The official screenshot also shows an angle value and percentage meter. Use those readings to compare attempts from the same arrangement. The displayed values are examples in an image, not a universal prescription for obstacle layouts.
When a shot fails, write down the first meaningful contact. “Hit the brickwork before reaching the wall” is a better diagnosis than “not enough power.” Your next test can focus on a route around that object while holding power close to the last attempt.
Make the drill useful for duels
Player challenges can be timed, as one public TFC recording shows. An obstacle practice session trains quick scanning: nearest object, wall, keeper, goal. In a duel, you may not have time for several trial shots. The ability to identify the first obstruction before you kick is the transferable skill.
Keep your practice plan simple enough to remember. A clear route that you can reproduce is more valuable than a spectacular bend you cannot explain. If the arena changes, restart the scan rather than pasting old angle and power values into a new geometry problem.
FAQ
Are the barrel and brick structure official TFC objects?
They are visible in an official Roblox image for the verified TFC experience. The image does not explain their exact controls or scoring effects.
Should I practice with every obstacle at once?
Start with a simpler route, then add difficulty one layer at a time so you can understand each miss.
What if the ball hits an object before the wall?
Solve that first collision. Replanning the wall route will not help if the shot never reaches it.
Is there one best angle for obstacle setups?
No universal angle is documented. Read the objects and guide in your current layout and test from there.