Diagnose the miss before touching a setting
When a free kick fails in That Freekick Challenge, name the outcome first: wall, wide, high, obstacle, or goalkeeper. Then change one thing that addresses that outcome. This is more effective than moving the aim, angle, and power together because you can tell whether the next attempt actually improved.
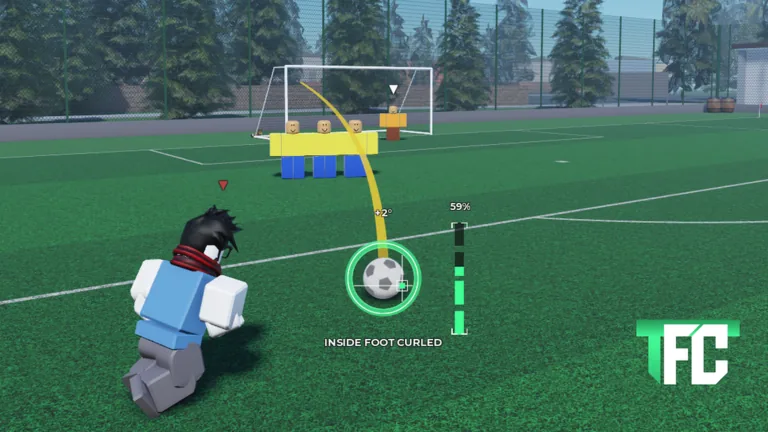
The game’s own images show a defensive wall, goalkeeper, curved trajectory guide, angle value, and percentage meter. They do not establish a universal power formula. Use the visible values as repeatable reference points for your own shots rather than treating one screenshot’s number as an instruction.
Match one correction to one outcome
| Result | What to inspect | One next adjustment |
|---|---|---|
| Ball reaches the wall | Where the displayed arc passes the defenders | Move the path around the wall while holding power roughly steady. |
| Ball goes wide | Where the route crosses the goal line | Shift the target back toward the goal in a smaller step. |
| Ball goes high | The power reading and the end of the visible route | Test a lower power setting from the same position. |
| Goalkeeper saves | The keeper’s starting position and chosen target | Aim for a different open lane rather than only adding power. |
| Ball meets an obstacle | The object and the point of contact | Simplify the setup or route around that object. |
These are practice decisions, not promises about hidden ball physics. A high shot, for example, can involve more than power; lowering power is simply a clean test when you can hold the other conditions steady.
Keep your comparison fair
Start from the same location and setup for two or three attempts. Before each kick, write down or remember the visible angle, shot type, and meter percentage. After the shot, record only the result that matters: blocked, wide, high, saved, or scored. If you change the wall arrangement between attempts, you are testing a different problem and cannot compare the shots directly.
A player-recorded TFC duel includes quick power adjustments during a countdown. That recording shows players trying several percentages, not a reliable ideal value. Time pressure makes a familiar baseline especially useful: pick the setup you already understand, then make one small correction after a miss.
If you cannot reproduce a shot exactly, compare broad outcomes. Did the new path clear the wall? Did the ball end up nearer the chosen side of the goal? That is enough to decide whether to continue in the same direction. You do not need an invented degree-to-distance chart.
When to reset the whole shot
One-variable corrections work while the basic lane remains usable. Reset when the wall blocks every nearby line you have tested, an obstacle sits directly on the route, or the goalkeeper covers the target you chose. At that point, select a new lane and establish a fresh baseline. Then resume small changes.
The distinction matters: small errors call for small corrections; a bad setup calls for a new plan. If you keep turning the angle farther after repeated wall contact without watching the preview, you can trade one problem for a wide miss. Look at the complete route from ball to goal each time.
For a longer session, alternate easy and difficult setups. The easier shot checks whether your basic timing and aiming still feel consistent. The harder shot tests the specific correction you are learning. That structure turns missed shots into useful feedback instead of a string of guesses.
FAQ
What should I change first after hitting the wall?
Inspect the displayed route where it reaches the wall, then test a path around the defenders while keeping the other settings close to your previous attempt.
Does a higher power setting always help?
No. The visible percentage is useful for comparison, but no universal best value is documented. Test it from a consistent setup.
Why did a clear shot still fail?
Clearing the wall is only the first part. The ball can still go wide, meet an obstacle, or reach the goalkeeper.
Should I copy the values shown in promotional images?
Use them to identify the interface. They show example states, not guaranteed settings for your position.